| Introduction
This tutorial is a starting point for developing Android apps. It will explain the very basics of the Android SDK (Software Development Kit) and how to use it with Eclipse. To understand this tutorial, you don't need to have any knowledge about programming in Java, but it might be helpful for further programming to understand the basics of object orientated programming. This tutorial explains Android beginners how to create an Android Project in Eclipse, work with resources, and create some first code.
Setup Eclipse and the Android SDK
If you don't already have a running environment to develop Android apps, follow the instructions at this link.
Hint: PATH means the Path Environment Variable. In Windows, you will find it under "Control Panel/System/Advanced System Settings/Environment Variables" in the lower list box. You can check what version of Java is installed, by going in the command line and typing java -version.
Let's Get Started
Now we want to create our first application, which is (as always) a Hello World application. First of all, start Eclipse. Then select "File/New/Project". In the "New Project" dialog, select "Android/Android Project" and click "Next".
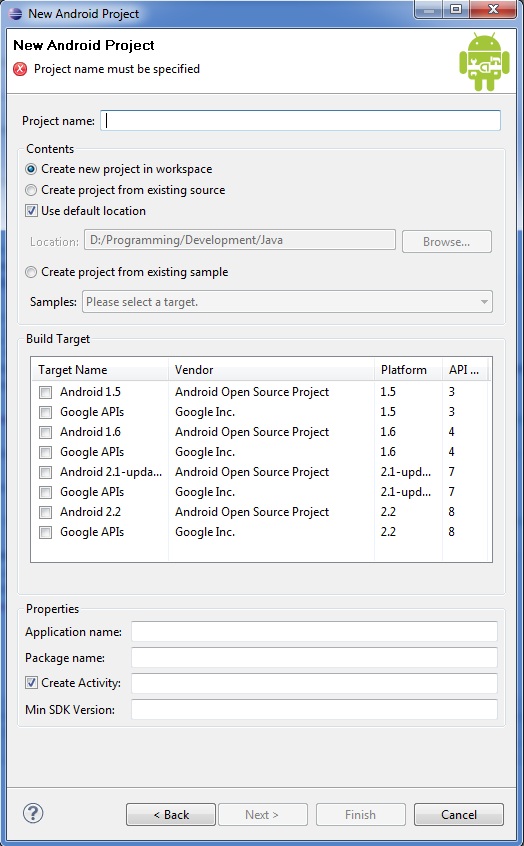
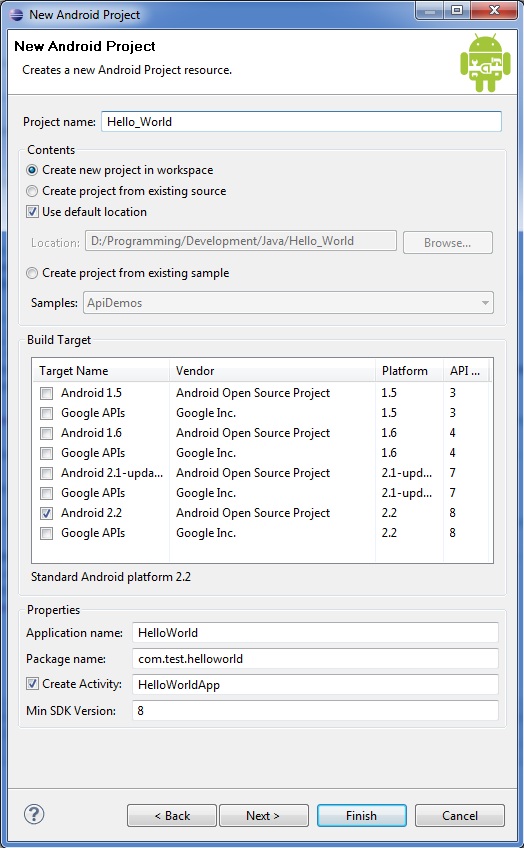
Here you can set up the project. First of all, we need to give the project a name, so type "Hello World" in the name box. Next you have to select the Android version you want to use. Here we choose version 2.2. As we see in the last column, we need the API Version 8 for this Android version, so we type an "8" in the Min SDK Version box. Also, the project requires an application name. (Notice that this name is also used in code, so the name should have no whitespaces). Usually, you use the project name and delete all whitespaces (e.g., "helloworld" for this project). Next, you have to define the package of the project. We will use "com.test.helloworld" here (a package can group multiple classes; for more information, see here). At least, you need a name for the activity (one App might have multiple Activities; they are like a single part/screen of the app). In this example, we simply use "HelloWorldApp".
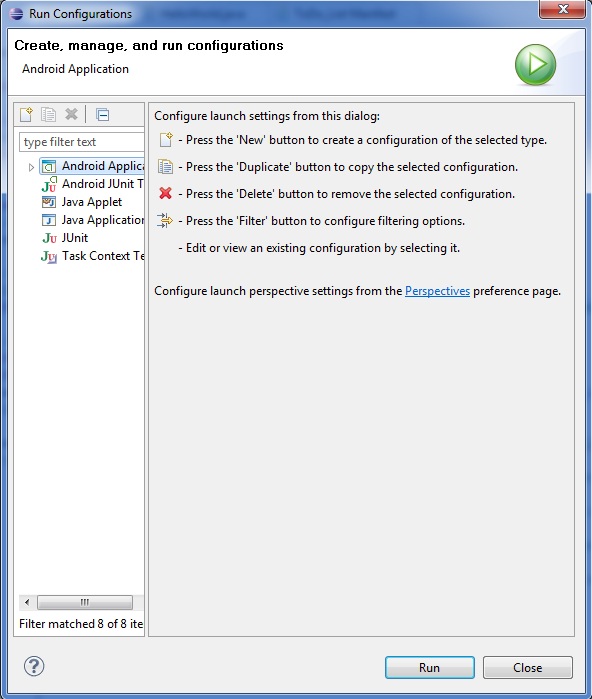
Before we can finally start our first project, we need to create a configuration. This configuration specifies under which circumstances the app will be started. E.g., you can control the network speed the emulator/app can use. Also, you can choose different emulators to test the app with different versions of Android or in different screen sizes. To create the configuration, go to "Run/Run Configurations". Now click the "Android Application" tab at the side and then the New button above the tabs. Call the new configuration "HelloWorldConfig" and select our project over the Browse button. Now move on to the target tab. Here you can select the network speed and which emulator will be used.
Since we haven't created an emulator till now, we need to do that first. Click the automatic control to enable the buttons at the side and then click on the manager-button. Here, click the new button to the right to create a new emulator. In the following screen, you can enter a name for the emulator (I have used "DefaultAndroidEmulator") and specify the details (like Android version, SD card size, and much more). You can control every little detail of the emulator over the hardware section.
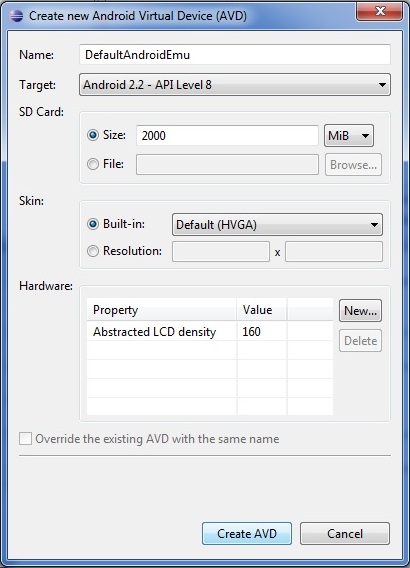
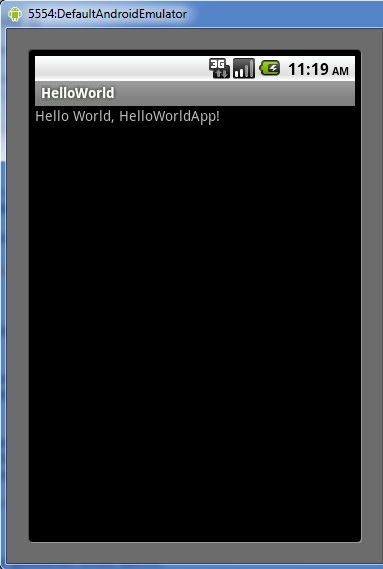
Once you are done with that, click "Create AVD" and close the manager window. Now we have successfully created the run configurations. Click "Apply" and close the configurations. At least run your first Android project.
Notice: It may take the emulator some time to get started, so be patient! Also, I have cropped the image so that you can't see the keyboard or the D-pad.
Congratulations! You just created your first App!
 Coding is Fun
After we have set up everything, it's (finally) time to actually getting started with the code, because we all know: Coding is fun!
But before we can actually jump into the Java code, we need to understand the structure of an Android Application. Go to your Package Explorer and enlarge the "Hello World" project. You will see five folders and two files. Let's get started with the one of these two files, the AndroidManifest file. This file contains all the information about your project, like the icon, the name of the author. To open it, make a right click on it and choose "Open With/AndroidManifest Editor". In the upcoming tab, you can specify the package name and the version of your project. At the bottom, you will find additional tabs. I think most of the settings you will find are pretty much self-explanatory. Note the @ in front of some attributes. This shows that the following string is a reference to a resource. You can find the resources in the "res" folder of your project. If you enlarge it, you will notice that it has some subfolders. To be specific, the res folder can have seven types of subfolders: values, drawable, layout, animations, xml, styles, andraw.
Let's focus on the values folder first. Here you can store all kinds of simple resources (like strings, colors, numbers, dimensions, arrays, etc.). By default, you will find the strings.xml file in there. When you open it (with right click, "Open with/Android Layout Editor"), you will see that it contains two values. The first is the message you see when you run your project, and the second is the name of your app. You can add new values if you want to use them later on in code (or in the Manifest or Layout files). You can also create specific resources using quantifiers. If you add a - to the folder's name, you can add a quantifier to the name. E.g., you can rename the values folder to values-en which means that the content of the folder is only used by Android phones with English language activated. If you do not add a quantifier, the resources are default. The default resources are used if no specific resources for the current system are found. If the project is started, all resources will be compiled as efficiently as possible and added to the package. Also, a reference will be created (called R) which allows you to access the resources in code. Since this is only a tutorial, I will not focus on all the types of resources here. You can find more information on resources and quantifiers here.
At last, it is time to start coding! Go to the "src" folder. In the folder, you will find the package folder, open theHelloWorld.java file. You will see the default code for an Android Activity:
package com.test.helloworld; //the package we are working in

//some android packages we need to import
import android.app.Activity;
import android.os.Bundle;

//our activity class (extendes the default activity class)
public class HelloWorldApp extends Activity {
    /** Called when the activity is first created. */
    @Override
    //the function called when activity is created
    public void onCreate(Bundle savedInstanceState) {
        //call the create fct. Of the base class
        super.onCreate(savedInstanceState);
        //load the layout specified in the layout.xml
        setContentView(R.layout.main);
    }
}
As you can see, we create a new activity by extending the default Android activity class. Then we override the default
onCreate function, which is called when the project is created. In there, we load our own layout from the resources and also call the onCreate function of the base class. Now let's take a closer look at the layout file. You find it in the layout folder under resources. When you open it, it should look like this:<linearlayout android:layout_height="fill_parent"
android:layout_width="fill_parent" android:orientation="vertical"
xmlns:android="http://schemas.android.com/apk/res/android" />
<textview android:layout_height="wrap_content"
android:layout_width="fill_parent" android:text="@string/hello" />
</linearlayout />
You see the root node is called
LinearLayout. As you you might already have figured out, there are different types of layouts:
Once you have chosen a layout type, you can add child elements. In the code given, there is already a
TextView, which is used to display text on the screen. The current content is a reference to a resource defined in thevalues.xml file. As you will see, it uses the whole width of the screen, but is only as long as it needs to, to display the content. We might start with some small changes. Let's change the text color of the TextView to green:<textview android:layout_height="wrap_content"
android:layout_width="fill_parent" android:text="@string/hello"
android:textcolor="#FF00FF00" />
Now, launch the project and see the changes. Next, let's add a new control called
EditText:<linearlayout android:layout_height="fill_parent"
android:layout_width="fill_parent" android:orientation="vertical"
xmlns:android="http://schemas.android.com/apk/res/android" />
<edittext android:layout_height="wrap_content"
android:layout_width="fill_parent" android:textcolor="#FF0000FF"
android:id="@+id/et_Text" />
<textview android:layout_height="wrap_content" android:layout_width="fill_parent"
android:textcolor="#FF00FF00" android:id="@+id/lv_View" />
</linearlayout />
When we want to access the controls in code, they need to have an ID. Next we create some code for the controls. Go to the helloworld.java file.
@Override
public void onCreate(Bundle savedInstanceState) {
    super.onCreate(savedInstanceState);
    //loading the layout over the resource reference
    setContentView(R.layout.main);

    //get the two controls we created earlier, also with the resource reference and the id
    final TextView tv_View = (TextView)findViewById(R.id.tv_View);
    final EditText et_Text = (EditText)findViewById(R.id.et_Text);

    //add new KeyListener Callback (to record key input)
    et_Text.setOnKeyListener(new OnKeyListener()
    {
        //function to invoke when a key is pressed
        public boolean onKey(View v, int keyCode, KeyEvent event)
        {
            //check if there is
            if (event.getAction() == KeyEvent.ACTION_DOWN)
            {
                //check if the right key was pressed
                if (keyCode == KeyEvent.KEYCODE_DPAD_CENTER)
                {
                                    //add the text to the textview
                    tv_View.setText(tv_View.getText() + ", " +
                                     et_Text.getText());
                                    //and clear the EditText control
                    et_Text.setText("");
                    return true;
                }
            }
            return false;
        }
    });
}
We will analyze the code line by line. First of all, as before, we load the layout. Then we create a
TextView and aEditText variable and load our interface objects in them (that's what we need the ID for). Finally, we add a newOnKeyListener to the EditText control. In this OnKeyListener, we create the method onKey, which is called when a key is pressed, when the control is active. In the method, we perform two checks: the first to be sure that a key is pressed down (and not released), and the second to specify the key (in this case, the center key of the D-pad). If both checks are passed, we add the text of the EditText control to the TextView, and finally the text of the EditText control is deleted. Run and test the application. Great, you created your first real Android app.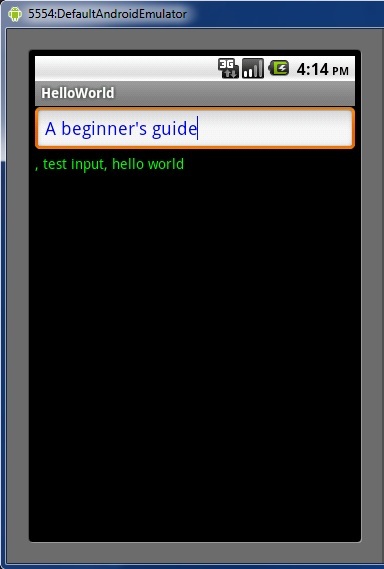 Android App Design
As with every platform, Android has its own design challenges. Always keep in mind that you are developing for a mobile platform with limited memory, disk space, and processing power. Therefore, Android automatically kills processes (each app runs in its own process) to keep the system responsive. Processes are sorted after importance. The most important is the currently active process, followed by visible and stated service processes. The bottommost types of processes in hierarchy are background and empty processes. Keep that in mind when you design your application, because you don't want its process to be killed in the middle of something. Also, you can use whatever hardware is built into the Android phone. But notice that not all phones might have this hardware, and so not all might be able to run your app.
|

Android - A beginner's guide
Subscribe to:
Post Comments (Atom)
No comments:
Post a Comment